
The secret to breathtaking aurora photos isn’t a specific camera setting; it’s a strategic system of prediction, preparation, and protection against the elements.
- Forecasting is more than the Kp index; understanding Bz and solar wind speed is critical for predicting a display’s intensity.
- Your ability to operate in extreme cold, through layering systems for both you and your gear, directly impacts your photographic success.
Recommendation: Shift your focus from just camera settings to mastering the ‘before’ and ‘after’ of the shoot—reading space weather and protecting your gear from condensation.
You’ve invested thousands of dollars and traveled to the edge of the Arctic Circle for a single reason: to witness the ethereal dance of the aurora borealis. The memory will last a lifetime, but the photograph is the trophy. Every online guide offers the same generic starting point: a wide lens, a sturdy tripod, and the magic formula of f/2.8, 20 seconds, and ISO 1600. While this advice isn’t wrong, it’s dangerously incomplete. It’s the equivalent of knowing how to press the accelerator in a race car without understanding the track, the weather, or the engine.
The difference between a blurry, green smear and a crisp, vibrant image of the heavens on fire lies not in those basic settings, but in the strategic blueprint you follow. This guide moves beyond the platitudes. We will not just tell you *what* to do; we will explain *why* you’re doing it, from the perspective of an astrophotographer who has spent countless nights under the polar sky. The true key to capturing the aurora is mastering a system: understanding the language of space weather to be in the right place at the right time, building thermal resilience for you and your gear, and executing techniques that manage the extreme environmental challenges. It’s time to stop being a tourist with a camera and start thinking like a prepared astrophotographer.
text
This comprehensive guide is structured to build your strategic blueprint layer by layer. We’ll start with the crucial science of forecasting, move to location and gear preparation, and finally, cover advanced techniques for capturing and protecting your once-in-a-lifetime shots. The following sections will equip you with the knowledge to transform your aurora chase from a gamble into a calculated mission.
Contents: A Strategic Blueprint for Aurora Photography
- Kp Index Explained: How to Read the Forecast to Avoid Disappointment?
- Iceland vs Norway: Which Country Has Fewer Cloudy Nights?
- The “Standing Still” Layering System for -20°C Weather
- Condensation Risk: How to Bring Your Camera Inside Without Ruining It?
- Totality or Nothing: Why 99% Partial Eclipse Is Still Daylight?
- Natural Light vs Ring Light: Which Flattens the Face Less?
- HDR vs Flash: How to Light a Pitch Black Basement?
- How to Shoot Professional Portraits Using Only an iPhone?
Kp Index Explained: How to Read the Forecast to Avoid Disappointment?
The Kp index is the first metric every aurora chaser learns, but relying on it alone is a rookie mistake. It’s a global average of geomagnetic activity, a good starting point, but it lacks the nuance needed for a successful hunt. A high Kp number means nothing if the energy isn’t directed toward Earth. This is where understanding the “interplanetary magnetic field” (IMF), specifically the Bz component, becomes your secret weapon. The Bz value indicates the north-south direction of the solar wind’s magnetic field. When it turns southward (a negative value), it “opens a door” in Earth’s magnetosphere, allowing charged particles to flood in and create brilliant auroras.
Astrophotography experts agree that a negative Bz value below -10 nT can trigger strong aurora displays even during periods of a moderate Kp index. Conversely, a high Kp with a positive Bz will often lead to a disappointing, faint glow. The second critical factor is solar wind speed. Speeds above 500 km/s act like a pressure washer, forcing more particles into the atmosphere and intensifying the display. Your goal is to find the trifecta: a sufficient Kp for your latitude, a strongly negative Bz, and high solar wind speeds. This is the essence of what I call geomagnetic intelligence—looking beyond the headline number to the data that truly matters.
Your Pre-Hunt Checklist: Key Metrics to Verify 1 Hour Out
- Kp Index: Confirm the index meets the minimum for your latitude (e.g., Kp 4 in Anchorage, Kp 5 in North Dakota).
- Bz Value: Look for sustained negative values. Below -5 nT is good; below -10 nT is the signal for a major show.
- Solar Wind Speed: Speeds over 500 km/s are promising. If you see speeds approaching 700 km/s, activity can be intense regardless of Kp.
- Hemispheric Power: Check the Hemispheric Power Input (HPI). A reading over 50 GW indicates a strong event is likely.
- OVATION Model: Use the 30-minute OVATION forecast. The red areas on the map show where the probability of seeing the aurora is 90% or higher.
Iceland vs Norway: Which Country Has Fewer Cloudy Nights?
The question of Iceland versus Norway is a false dichotomy. The real enemy of any aurora photographer isn’t the country, but the clouds. Both nations offer world-class aurora viewing, but their coastal geography means weather is volatile and highly localized. A better question is: “Where can I find a microclimate that maximizes my chances of clear skies?” This is where microclimate arbitrage—exploiting localized weather patterns—becomes a more valuable skill than simply picking a country. Coastal areas in both Iceland and Norway are notoriously prone to cloud cover, often with clear night probabilities hovering around 20-30%.
However, specific inland locations can dramatically outperform these averages. Iceland’s Ring Road offers a key advantage: mobility. If the south coast is socked in, you can drive a few hours north or east to find a clear patch. Norway’s fjord-laced coast can be more challenging for cloud-chasing, but it provides access to one of the world’s best aurora microclimates. Your research shouldn’t stop at a national level; it must drill down to specific valleys and regions, weighing accessibility against historical weather data.
This comparative analysis, sourced from a comprehensive guide to aurora photography, highlights how different factors play out. Notice how an inland location near Norway dramatically shifts the odds.
| Factor | Iceland | Norway (Tromsø) |
|---|---|---|
| Average Clear Nights (Winter) | 30-40% | 20-30% coastal, 60%+ inland (Abisko) |
| Accessibility | Ring Road allows easy cloud chasing | Requires ferries for island access |
| Foreground Options | Volcanic textures, ice caves, black beaches | Dramatic fjords, coastal mountains |
| Light Pollution | Very low outside Reykjavik | Minimal in Lofoten Islands |
| Alternative Activities | Geothermal spas, glacier tours | Husky sledding, Sami culture |
Case Study: The Abisko ‘Blue Hole’
While coastal Norway sees frequent cloud cover, the village of Abisko in Swedish Lapland (right on the Norwegian border) is a prime example of microclimate arbitrage. A rain shadow effect created by the surrounding mountains gives it one of the highest clear-sky probabilities in the entire aurora zone, often exceeding 60% in winter. This demonstrates that deep, location-specific research is far more predictive of success than a simple country-to-country comparison.
The “Standing Still” Layering System for -20°C Weather
The most common failure point in aurora photography has nothing to do with the camera—it’s the photographer. When you’re standing still for hours in -20°C (-4°F), your body isn’t generating heat. Standard ski or hiking apparel is designed for motion; it will fail you here. You need a “standing still” system focused on two principles: massive insulation and absolute wind-proofing. This isn’t about fashion; it’s about survival and operational effectiveness. Your system starts with a moisture-wicking merino wool base layer, followed by a thick fleece or down mid-layer, and finally, an oversized, windproof/waterproof shell (often a full-body expedition suit). The goal is to trap a thick layer of dead air around your body.
This concept of thermal resilience extends directly to your hands, which are your most critical tools. You cannot operate a camera with bulky mittens, but you’ll get frostbite in seconds without them. The solution is a tiered glove system. This allows you to perform fine motor tasks with thin liners and then quickly return your hands to the warmth of a heavily insulated outer layer. Battery life is another victim of the cold; they can lose over 50% of their charge. As astrophotographer Tom Kerss notes in his photography guide:
Batteries drain faster in cold weather so don’t forget to have your camera charged, along with a spare set of batteries
– Tom Kerss, Northern Lights Photography Guide
Keep your spares in an internal pocket close to your body heat. The cold is a relentless adversary; your preparation must be equally relentless.
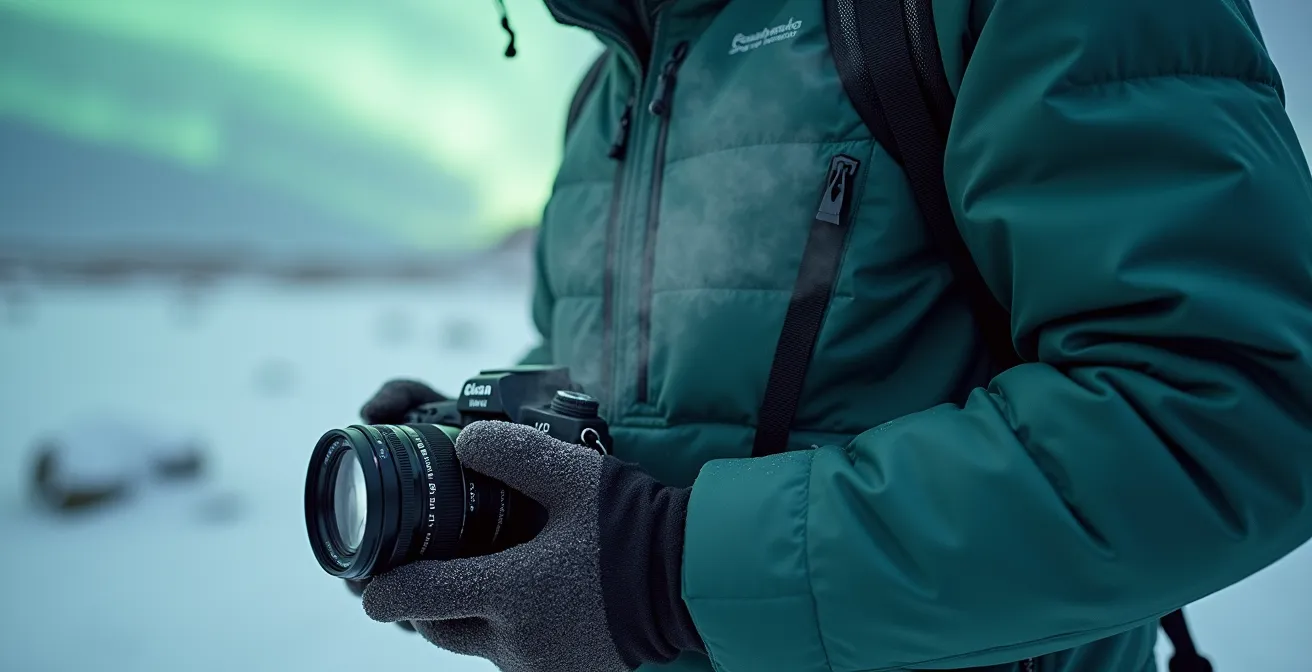
As this image shows, the system is about the technical interaction between layers. Each material—from the moisture-wicking wool to the puffy insulation and the sealed outer shell—plays a specific role in maintaining a stable microenvironment for your body. The same principle applies to your hands; a single pair of gloves is not a solution, a system is. Here is a field-tested glove system:
- Base Layer: Thin, touchscreen-compatible liner gloves are essential for operating camera controls without exposing your skin.
- Mid Layer: Over the liners, wear fleece or wool fingerless gloves. This adds a crucial layer of insulation while keeping your fingertips free.
- Outer Shell: Heavy-duty, windproof mittens with magnetic closures are ideal. You can flip them open instantly for a shot and close them just as fast.
- Emergency Backup: Always carry chemical hand warmers. Store them in your pockets to create a warm refuge for your hands between shots.
Condensation Risk: How to Bring Your Camera Inside Without Ruining It?
You’ve survived the cold and captured incredible images. The final battle is one you can lose after the shooting is over: condensation. Bringing a sub-zero camera and lens into a warm, humid cabin is a recipe for disaster. As the frigid metal and glass hit the warm air, moisture instantly condenses on—and inside—every surface. This can lead to foggy lenses for hours, fungal growth on internal elements, and short-circuited electronics. The single biggest mistake is removing the memory card while the camera is still cold; photography equipment manufacturers warn that SD cards can corrupt data when removed below 0°C due to invisible condensation forming on the electrical contacts.
The solution is a strict acclimatization protocol. You cannot rush this process. The goal is to allow the camera to warm up to room temperature gradually, while sealed in a pocket of the dry, cold air it came from. A large, airtight plastic bag (like a Ziploc freezer bag or a dry bag for kayaking) is the most important piece of “after-care” equipment you can own. Before you even think about heading indoors, your camera, with the lens attached and memory card inside, must be sealed in this bag. Squeeze out as much excess air as possible before sealing it.
Once inside, leave the sealed bag untouched for several hours—or even overnight. Do not open it until the gear inside is no longer cold to the touch through the bag. This slow, controlled warm-up is the only way to guarantee you avoid the devastating effects of internal condensation. For a more robust process, a two-stage acclimatization is even better:
- Stage 1 – The Airlock (Cool): Before bringing the gear inside your 20°C room, place the sealed bag in a cool, unheated space like a car trunk or an arctic entryway (around 0-10°C) for at least 30-60 minutes.
- Stage 2 – The Final Thaw (Warm): Move the still-sealed bag into the warm room. Let it sit for another 1-2 hours, or until it has fully reached room temperature.
- Critical Rule: Never remove the lens or memory card until the entire camera body feels room temperature through the bag.
Totality or Nothing: Why 99% Partial Eclipse Is Still Daylight?
For those chasing celestial events, a solar eclipse presents a similar photographic challenge to the aurora: a massive dynamic range battle. However, there’s a perceptual trap with eclipses that often surprises people. The experience of a 99% partial eclipse and a 100% total eclipse are not 1% different; they are profoundly, fundamentally different worlds. At 99% coverage, it is still daylight. The sky might be a deep twilight blue, but you won’t see the sun’s corona, stars won’t appear, and the dramatic “hole in the sky” effect is completely absent. Why?
The answer lies in the logarithmic way both our eyes and cameras perceive brightness. The sun’s photosphere is astonishingly brilliant. The last 1% of its surface, a tiny sliver of light, produces approximately 10,000 times more light than a full moon. Our eyes adapt to this brightness so effectively that we don’t consciously register the 99% reduction in light as darkness. It’s only in the final seconds, as that last sliver vanishes, that the ambient light level plummets, and the universe is transformed. The faint, ghostly light of the corona—a million times dimmer than the sun’s surface—can finally be seen.
This image captures the photographer’s struggle during the partial phases. Even with a solar filter, capturing detail in the sun without blowing out the highlights while retaining any landscape detail is a test of your camera’s limits. It’s a reminder that until totality, you are photographing the sun. Only during totality are you photographing the sun’s atmosphere. This distinction is absolute. As the case study shows, this is not just an opinion, but a matter of physics.
The Logarithmic Brightness Challenge
The human eye’s inability to perceive the difference between 99% and 100% eclipse coverage is a classic example of logarithmic perception. The last 1% of the sun’s light is so overwhelmingly bright that it completely masks the corona. This is similar to how a faint Kp 2 aurora might be technically active in the sky during twilight, but it remains completely invisible to the naked eye because the ambient light from the sun is millions of times brighter. Only when that competing light source is completely removed does the faint, beautiful structure become visible. For eclipse chasers, the mantra is “totality or nothing” for a reason.
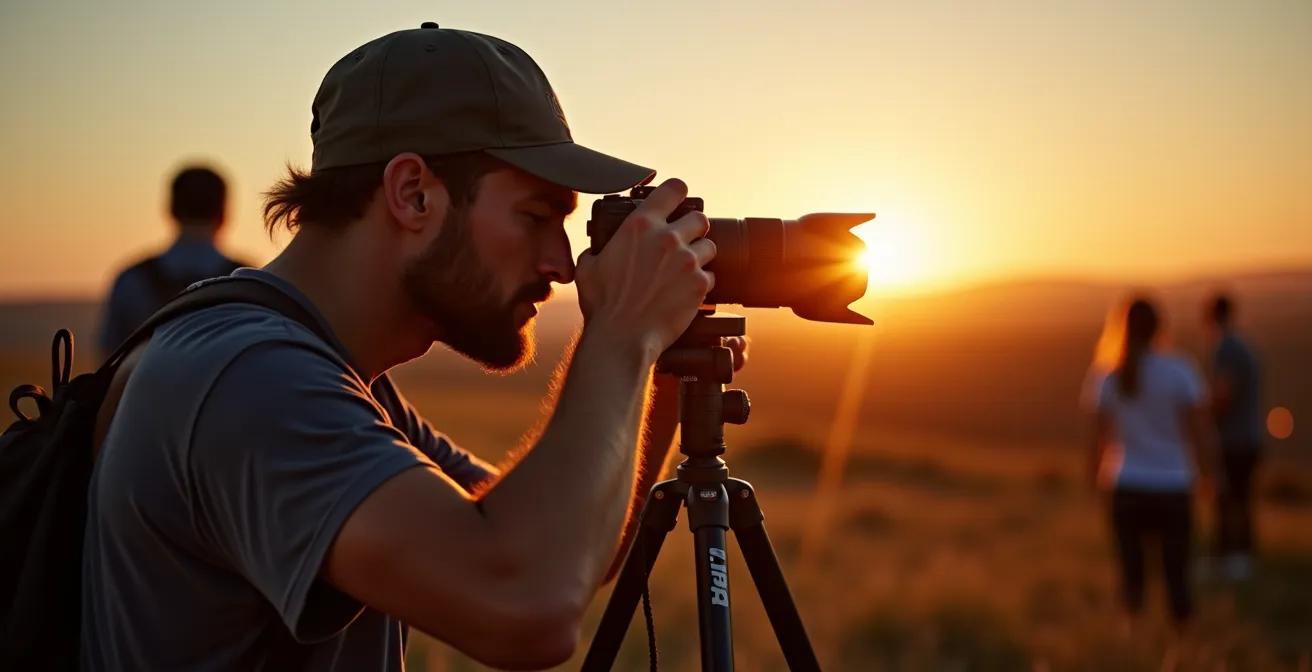
Natural Light vs Ring Light: Which Flattens the Face Less?
While a ring light might seem worlds away from the arctic night, the underlying principle of light quality is universal and directly applies to aurora portraiture. In the context of astrophotography, the “natural light” is the aurora itself, and the “ring light” is any artificial source you use to illuminate a foreground subject, such as a person. A ring light, by design, provides flat, shadowless illumination. This is why it’s popular in beauty vlogs, but it’s precisely what you want to avoid when adding a human element to a majestic aurora shot. Flat light disconnects the subject from the epic, dramatic environment.
The goal is to make your artificial light *mimic* the qualities of natural, directional light. Instead of a head-on flash, you need to use light painting techniques. A small, dimmable LED panel or even a headlamp with a red filter, held off to the side (45-90 degrees from the camera), will create soft, dimensional shadows on your subject. This technique, called modeling light, makes the person look like they are truly part of the scene, with their form and features sculpted by a light source within the environment. During a long exposure (10-15 seconds), you can “paint” your subject with a quick, gentle sweep of the light beam. This takes practice, but it’s the difference between a person who looks pasted onto a background and one who is living within the landscape.
The key is subtlety. The artificial light should be just bright enough to separate the subject from the dark background, but not so bright that it overpowers the faint light of the aurora in the sky. It’s a delicate balance, where less is always more. Your aim is to add just a kiss of light to reveal shape and form, not to blast the scene with a flash.
HDR vs Flash: How to Light a Pitch Black Basement?
This question, when translated to astrophotography, becomes “How do you capture detail in a pitch-black foreground under a bright aurora?” This is the ultimate dynamic range battle. Using a flash is almost always the wrong answer. A single burst of light creates harsh shadows, specular highlights on reflective surfaces (like wet rocks or ice), and an unnatural “crime scene photo” look. It destroys the mood. The High Dynamic Range (HDR) technique, while powerful, can also be problematic. It involves blending multiple exposures, which is difficult when the aurora is moving and changing shape between your shots, often resulting in ghostly artifacts.
The superior professional technique is a combination of exposure blending and light painting. First, you take a long exposure (e.g., 20 seconds at ISO 3200) focused on the sky to perfectly capture the aurora. The foreground will likely be a dark, noisy silhouette. Without moving your tripod, you then shoot a second, much longer exposure (e.g., 2-4 minutes at a lower ISO 100 or 200). This long exposure is dedicated entirely to gathering the faint, ambient light for the foreground. It will overexpose the sky completely, but it will render the landscape with rich detail and low noise.
During this long foreground exposure, you can add subtle light painting. A very dim headlamp can be used to gently brush light across interesting features like trees or rock formations to give them definition. Another powerful technique is to wait for the full moon. While a full moon can wash out faint auroras, its soft, ambient light is perfect for illuminating a vast snowy landscape during a strong geomagnetic storm. In post-processing, you then layer these two images (the perfect sky and the perfect foreground) and mask them together to create one seamless, perfectly exposed photograph that is impossible to capture in a single frame.
Key Takeaways
- Success in aurora photography is 80% strategy and 20% settings. Focus on forecasting and preparation.
- Mastering a “standing still” layering system for your body and a tiered system for your gloves is as important as your camera gear.
- Always use a strict acclimatization protocol (the “sealed bag method”) to prevent catastrophic condensation on your gear.
How to Shoot Professional Portraits Using Only an iPhone?
While a dedicated camera system will always provide superior quality, the question for many travelers is: “Can I get a decent aurora shot with just my iPhone?” The answer, surprisingly, is yes—if you have the right tools and techniques. Modern smartphone cameras have incredibly sophisticated night modes that use computational photography to stack multiple exposures. However, you cannot simply hand-hold your phone and expect a good result. The principles of astrophotography still apply.
First and foremost, you need absolute stability. A small, portable tripod with a smartphone mount is not optional; it is mandatory. Any motion will ruin the shot. Second, you must use an app that gives you manual control. The native camera app is often too automatic. Apps like ProCamera or NightCap Camera allow you to manually set a long shutter speed (up to 30 seconds), control the ISO, and, most importantly, set manual focus. Just like with a DSLR, you’ll need to focus on a distant star or light to achieve sharp focus at infinity.
For the best results, enable your phone’s RAW capture mode. A RAW file (often a .DNG) captures far more data than a standard JPEG, giving you much more flexibility to adjust brightness and reduce noise in post-processing using an app like Adobe Lightroom Mobile. While a phone sensor can’t compete with a full-frame camera in terms of light-gathering ability and noise performance, a well-executed shot from a tripod-mounted iPhone using manual controls and RAW capture can produce a memorable image that is infinitely better than a blurry, handheld snapshot. It proves that the core principles—stability, manual control, and thoughtful execution—matter more than the gear itself.
By shifting your mindset from a tourist hoping for luck to a strategist who manufactures it, you transform your entire trip. You’re no longer just a passive observer; you are an active participant in a celestial event. Applying this blueprint of forecasting, preparation, and technical execution is the final step in guaranteeing that the thousands you’ve invested result in a photograph—and a memory—that truly does justice to the spectacle in the sky.