The secret to radiant glass skin isn’t a complex 10-step routine; it’s the strategic use of three synergistic products focused on technique, not quantity.
- Formula compatibility is the number one factor in preventing pilling and achieving a smooth, seamless base.
- For a true ‘glass’ effect on oily or acne-prone skin, a sheer skin tint vastly outperforms a heavier BB cream.
Recommendation: Focus on mastering the application of a skin tint, a hydrating mist, and a brow grooming technique, while supporting your skin’s health from within through diet.
Every client who sits in my chair asks for the same thing: skin that looks luminous, fresh, and real. For years, the beauty world has been dominated by heavy contouring and full-coverage foundations that mask, rather than enhance. The “glass skin” trend emerged as a beautiful rebellion, promising a translucent, dewy glow that looks like you were born with perfect skin. The common belief is that this requires an intimidating, 10-step Korean skincare regimen and a cabinet full of expensive products.
But what if I told you that’s a myth? As a makeup artist, I can tell you the true secret isn’t about the number of products you layer. It’s about formula synergy and technical application. The most stunning “no-makeup makeup” looks are built on a deep understanding of how a few, well-chosen products interact with each other and with the skin. It’s about creating that luminous finish with intelligence, not excess.
This guide will strip away the noise. We’re going to bypass the 10-step routine and focus on mastering just three essential products. We’ll explore why your base products might be fighting each other, how to choose the right formula for your skin type, and the professional techniques to frame your face and maintain that dewy glow all day. We’ll even look at how your daily habits can build the perfect canvas from the inside out. Prepare to think like a makeup artist and unlock the real method to achieving that coveted glass skin finish.
Summary: A Makeup Artist’s Guide to Minimalist Glass Skin
- Why Your Tinted Moisturizer Pills and How to Prevent It?
- BB Cream vs Skin Tint: Which Formula Suits Oily Acne-Prone Skin?
- The “Natural” Oil That Actually Causes Breakouts for 60% of Users
- How to Groom Brows to Frame the Face Without Pencils or Powders?
- When to Reapply Mist: Keeping the Dewy Look Fresh After 3 PM
- Why Specific Lactobacillus Strains Reduce Eczema Flare-Ups?
- Why 20% Niacinamide Might Be Causing Your Redness and Irritation?
- How to Heal Hormonal Acne by Changing Your Breakfast Habits?
Why Your Tinted Moisturizer Pills and How to Prevent It?
Let’s start with the number one saboteur of a smooth, glass-like finish: pilling. You know the feeling—those tiny, frustrating balls of product that appear as you’re blending your makeup. This isn’t a sign of bad skin; it’s a sign of a chemical clash. Pilling is what happens when incompatible formulas are layered. The most common culprit is mixing a water-based product with a silicone-based one without allowing for proper absorption time. Silicones create a film on the skin, and if you apply a water-based foundation on top too quickly, the water has nowhere to go and rolls the silicone film right off.
Another factor is the use of certain ingredients in your skincare. Gums and polymers like xanthan gum or polyacrylamide, often used as thickeners, can destabilize the emollients in your foundation, causing them to separate and pill. Understanding this minimalist chemistry is the first step to a flawless base. It’s not about buying more products; it’s about making sure the ones you have are designed to work together in harmony.
Clinical Case Study: Solving Severe Pilling with Formula Analysis
Consider the case of Maya, a 34-year-old who experienced severe daily pilling. She was using “makeup-friendly” skincare, but her vitamin C serum and toner were creating high interfacial tension. More critically, her moisturizer contained polyacrylamide, which was breaking down the cyclopentasiloxane in her foundation. By switching to a serum with squalane and a moisturizer with a different polymer (acrylates copolymer), all pilling was eliminated within a week. This shows that the specific ingredients, not the product category, are what truly matter.
To prevent pilling, always allow your skincare to fully absorb for at least 60 seconds before applying makeup. More importantly, try to stick within the same product family: pair water-based skincare with water-based makeup, and silicone-based with silicone-based. This simple rule of formula synergy is a non-negotiable for achieving a seamless, second-skin finish.
BB Cream vs Skin Tint: Which Formula Suits Oily Acne-Prone Skin?
Now that we’ve established the rules of formula harmony, let’s select our first hero product: the base. For those with oily or acne-prone skin, the dream of a dewy finish can often feel like a tightrope walk over a greasy mess. Many people reach for a BB (Blemish Balm) cream, thinking its “multi-benefit” formula is the answer. However, these heavier creams often contain a high concentration of silicones and oils that can create a thick film, highlight texture, and, worse, clog pores.
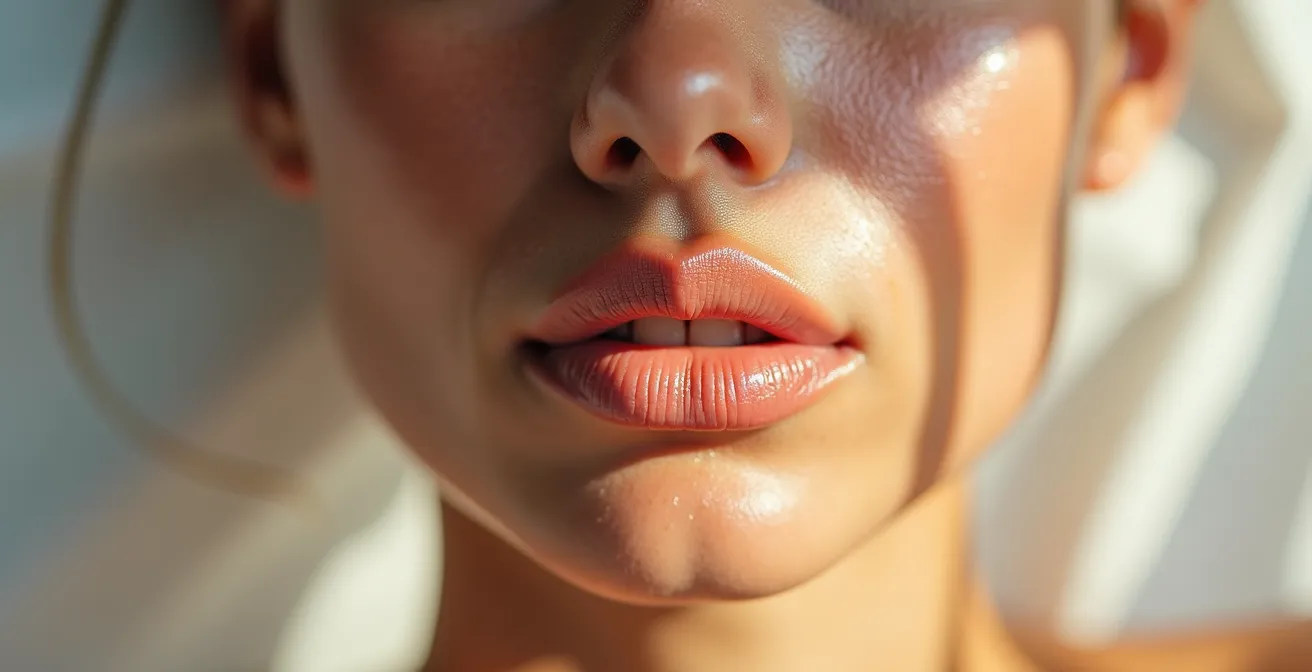
The true professional’s choice for a glass skin look, especially on this skin type, is a skin tint. Skin tints are fundamentally different. They are formulated with a higher water content and significantly fewer silicones, offering a sheer, translucent coverage that evens out skin tone without masking it. This lightweight texture is less likely to settle into fine lines or pores, creating a controlled, luminous glow rather than an oily shine. The minimalist formula also carries a much lower comedogenic risk.
The following table breaks down the key differences to help guide your choice, but for a true glass-like effect, the lightweight, breathable nature of a skin tint is unmatched.
| Feature | BB Cream | Skin Tint |
|---|---|---|
| Coverage Level | Medium to Full | Sheer to Light |
| Silicone Base | Heavy (can create greasy film) | Minimal to None |
| Finish on Oily Skin | Can highlight texture | Natural, controlled glow |
| Comedogenic Risk | Higher (multi-benefit formulas) | Lower (minimalist formulas) |
| Best For | Normal to Dry Skin | Oily, Acne-Prone Skin |
This image perfectly visualizes the difference: the BB cream creates an opaque coating, while the skin tint provides a translucent, water-like sheen that lets the natural texture of the skin show through. That is the essence of the glass skin aesthetic.

The “Natural” Oil That Actually Causes Breakouts for 60% of Users
In the quest for natural beauty, there’s a pervasive myth that “if it’s natural, it must be good for you.” One of the biggest offenders in this category is coconut oil. Hailed as a miracle cure-all, it’s often recommended for everything from makeup removal to moisturizing. However, for anyone with skin prone to congestion or acne, it can be a disaster in a jar. The reason lies in its comedogenic rating—a scale that measures how likely an ingredient is to clog pores.
Studies show that on this scale, coconut oil scores a 4 out of 5 for pore-clogging potential. This is exceptionally high. While it’s true that coconut oil contains lauric acid, which has antibacterial properties against the bacteria that contributes to acne, this benefit is completely negated by its physical properties. Its molecular structure is large, and its high saturated fat content means it sits on top of the skin, forming an occlusive barrier that traps dirt, sebum, and dead skin cells inside the pores.
For a glass skin routine that relies on clarity and smoothness, using a highly comedogenic oil is counterproductive. It’s a perfect example of why understanding ingredient science is more important than following natural-is-better trends. Instead of coconut oil, look for non-comedogenic oils like squalane, grapeseed, or sunflower oil if you need an oil-based product. For the glass skin look, however, it’s often best to rely on water-based hydrators and let your skin tint provide the luminous finish.
How to Groom Brows to Frame the Face Without Pencils or Powders?
A true glass skin look is about holistic radiance, and nothing frames a luminous face better than perfectly groomed eyebrows. But here’s the minimalist secret: you don’t need to add another product like a pencil, powder, or colored gel to your routine. In fact, adding heavy, opaque color to the brows can detract from the sheer, translucent quality of the skin. The goal is structural grooming, not filling in.
We can achieve this using one of our three core products: the hydrating mist. This technique creates a “laminated” look that holds brows in place all day, giving them definition and a healthy sheen without any added pigment. It’s all about working with the hair you have to create a clean, upward-swept shape that opens up the eye area and complements the dewy skin.
This is a pure technique that elevates your look without adding clutter to your makeup bag. Follow these steps for a natural, professionally groomed finish:
- Dampen a clean spoolie: Take your glycerin-based hydrating mist (your second hero product) and spritz a clean spoolie brush once or twice. You want it damp, not soaking wet.
- Brush and set: Brush your brow hairs directly upward in short, firm strokes. After brushing up a small section, use your finger to press the hairs flat against the skin for about 10 seconds. This helps “set” them in their laminated position.
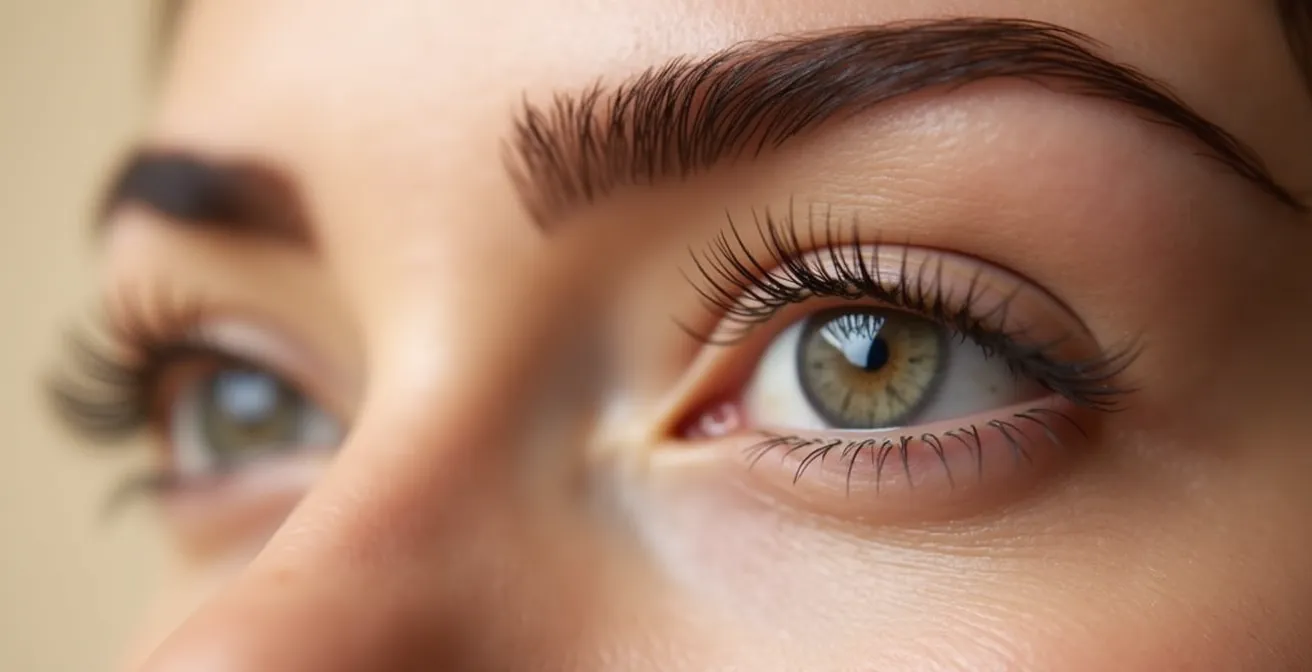
- Trim with precision: Once the brows are set, you’ll see any overly long hairs. Using a small pair of brow scissors, trim only the very tips of the longest hairs that extend too far above the main brow line. Always cut at a 45-degree angle for a soft, natural finish, never straight across.
The result is a fuller, more defined brow that looks effortlessly chic and perfectly frames your glowing skin, as shown in the image below.
When to Reapply Mist: Keeping the Dewy Look Fresh After 3 PM
Our second hero product, the hydrating mist, is more than just a tool for brow grooming. It’s the key to achieving and, more importantly, maintaining that dewy, just-applied look throughout the day. Many people mist their face randomly, but for a “glass skin” effect, we need to practice strategic rehydration. Skin has its own biological rhythm, and understanding it allows us to pre-empt the dreaded 3 PM slump when makeup starts to look dull and dry.
Research on skin chronobiology shows that the skin’s natural hydration and sebum production levels take a significant dip in the mid-afternoon. To counteract this, it’s best to reapply your mist proactively. Studies suggest that the ideal pre-emptive misting time is around 2:30 PM, just before this natural decline begins. This keeps the skin’s hydration levels stable and the finish of your makeup luminous.
But *how* you mist is just as important as *when*. Simply spraying your face can sometimes disrupt makeup or create visible droplets. The professional “Mist, Press, and Seal” technique revives your look without disturbing it, effectively “re-melting” your base makeup back into your skin for a seamless finish.
Your Pro-Technique for a Lasting Glow: The Mist, Press, and Seal
- Even Application: Hold the mist bottle 8-10 inches from your face. Spray lightly in a “T” formation (across the forehead and down the center) and then an “X” formation (from temple to opposite jaw) for even coverage.
- Settle and Absorb: Wait for about 10 seconds. Don’t touch your face. Allow the fine mist to settle onto the skin’s surface.
- Press, Don’t Rub: Using the clean, flat palms of your hands, gently press the mist into your skin. Use a firm but gentle rolling motion. Never rub, as this will smear your makeup.
- Seal the Finish: The warmth from your hands helps to seamlessly blend the mist with your skin tint, refreshing the dewy finish and making it look like you just applied it.
Why Specific Lactobacillus Strains Reduce Eczema Flare-Ups?
While makeup techniques are crucial for the *look* of glass skin, the truest, most lasting luminosity comes from a healthy, calm, and resilient skin barrier. For those who struggle with inflammatory conditions like eczema, achieving a smooth canvas can feel impossible. The answer may lie not on the makeup counter, but in the world of microbiology. Specific probiotic strains, particularly those from the Lactobacillus family, have shown remarkable results in managing skin health.
It’s not just about taking a general probiotic supplement. The science is specific: clinical studies on skin health show that topical application of strains like Lactobacillus paracasei and Lactobacillus rhamnosus directly influences skin behavior. These microorganisms interact with skin cell receptors to down-regulate inflammatory cytokines—specifically IL-4 and IL-13—which are the primary triggers for the redness, itching, and irritation of eczema.
Furthermore, these powerful strains do more than just calm inflammation. They actively encourage the skin to produce more ceramides. Ceramides are the essential lipids that form the “mortar” of your skin barrier, responsible for retaining water and keeping irritants out. A strong, ceramide-rich barrier is the very foundation of plump, hydrated, “glassy” skin. For those with compromised barriers, applying these strains via a targeted probiotic serum can provide much faster and more direct results for barrier repair than oral supplements alone, creating a healthier, smoother canvas for your minimalist makeup.
Why 20% Niacinamide Might Be Causing Your Redness and Irritation?
In our pursuit of perfect skin, the beauty industry often pushes a “more is more” philosophy, with brands one-upping each other with higher and higher concentrations of active ingredients. Niacinamide is a prime example. This powerhouse vitamin is celebrated for its ability to regulate sebum, minimize pores, and calm inflammation. But if you’ve ever tried a super-strength 20% niacinamide serum and ended up with more redness and irritation, you’re not alone. This is a classic case where more is actually worse.
The science is clear: the optimal benefits of niacinamide are achieved at much lower doses. Extensive studies show that a 2-5% concentration of niacinamide is highly effective for barrier repair and sebum control without overwhelming the skin. The problem with high concentrations isn’t just about overkill; it can be about contamination. High-strength niacinamide formulas (anything above 10%) have a higher risk of containing trace amounts of nicotinic acid, a byproduct of its synthesis. Nicotinic acid is a known vasodilator, meaning it causes blood vessels to expand, leading to temporary flushing and redness—the very thing you’re trying to avoid.
At a 20% concentration, skin receptors can become so overwhelmed that they trigger a defensive inflammatory response instead of the intended calming effect. For a minimalist glass skin routine focused on a calm, even-toned complexion, the “sweet spot” is a 4-5% niacinamide concentration. This delivers all the benefits—stronger barrier, less oil, reduced inflammation—while minimizing any risk of irritation. It’s a powerful reminder that effective skincare is about optimal dosage, not maximum strength.
Key Takeaways
- Achieving a glass skin finish is about formula synergy and application technique, not the number of products.
- For oily or acne-prone skin, a sheer, water-based skin tint provides a more authentic and less comedogenic glow than a heavy BB cream.
- True skin luminosity is supported from within by a balanced diet that stabilizes blood sugar and reduces inflammation.
How to Heal Hormonal Acne by Changing Your Breakfast Habits?
We’ve perfected our minimalist makeup technique and fine-tuned our skincare actives. But the final, and arguably most impactful, pillar of achieving true glass skin has nothing to do with what you put on your face. It’s about what you put in your body. For many, the battle for clear skin is fought against hormonal fluctuations that trigger painful, cystic acne along the jawline. The key to winning this battle often starts with your very first meal of the day.
Hormonal acne is heavily influenced by insulin spikes. A breakfast high in sugar and refined carbohydrates (like pastries, sugary cereals, or even just fruit juice) causes a rapid surge in blood sugar. Your body responds by releasing a flood of insulin, which in turn can increase the production of androgens—hormones that stimulate oil glands and lead to breakouts. By simply changing your breakfast, you can stabilize your blood sugar and begin to calm this inflammatory cycle from the inside out.
The “Glass Skin Breakfast” isn’t a diet; it’s a formula. It’s built around three core components: protein, healthy fat, and fiber. This combination provides sustained energy, keeps you full, and, most importantly, prevents the insulin spikes that fuel hormonal acne. It is the ultimate foundation for a clear, glowing complexion.

- Base of Protein: Choose a high-quality protein source like 2 eggs, a bowl of Greek yogurt, or a scoop of plant-based protein powder in a smoothie.
- Add Healthy Fat: Incorporate a source of healthy fat like 1/4 of an avocado, a small handful of walnuts, or a tablespoon of almond butter.
- Include Fiber: Add fiber with a handful of spinach in your eggs, berries in your yogurt, or chia seeds in your smoothie.
- Smart Swap: Consider swapping your morning coffee for spearmint tea, which has been shown to have natural anti-androgenic effects.
- Avoid: Steer clear of white bread, pastries, sugary cereals, and fruit juices that will sabotage your efforts.
By combining these internal wellness habits with smart, minimalist makeup techniques, you are not just faking glass skin—you are building it, one strategic choice at a time. The next logical step is to audit your current products and habits to create your own personalized 3-step routine.