The choice isn’t between oils and acrylics, but which modern, apartment-safe painting system best fits your creative goals.
- Acrylic paints can be modified with mediums to slow drying time, allowing for smooth, oil-like blending.
- Oil painting can be made completely safe and fume-free for small spaces by using water-mixable oils and non-toxic solvents.
Recommendation: Invest in a few high-pigment tubes of paint and the correct corresponding mediums, rather than a cheap, all-in-one starter set that leads to frustration.
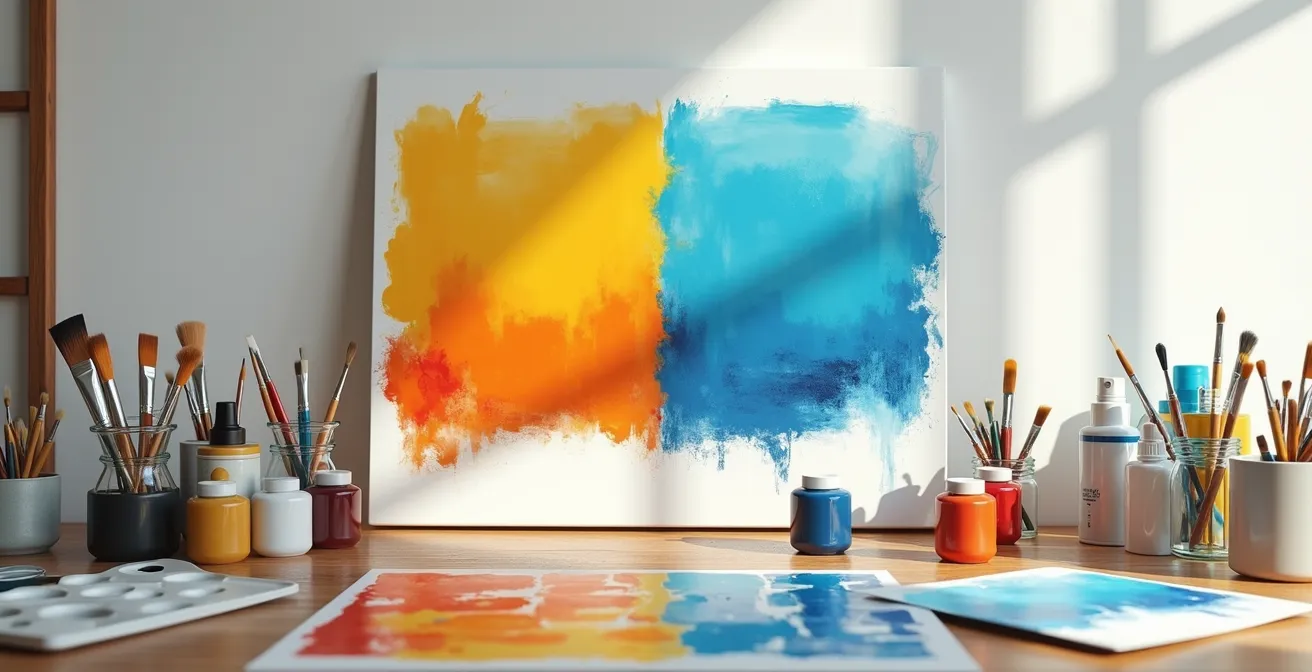
The dream of painting in your own apartment often crashes into a stark reality: the fear of toxic fumes, the frustration of paint drying before you can blend it, and the sheer lack of space. For aspiring artists, this condenses into one critical question: oils or acrylics? The conventional wisdom presents a false dichotomy. You’re told to use acrylics because they’re water-based and “safe,” but you quickly discover they dry so fast that creating soft, blended gradients feels impossible. On the other hand, traditional oil painting is revered for its results but demonized as a toxic, smelly process unfit for a small living space.
This decades-old advice is now obsolete. The debate is no longer about the paint tube itself, but about the entire painting system you build around it. Modern chemistry has given us remarkable tools to overcome the historic limitations of both mediums. You can make acrylics behave more like oils, and you can make oils entirely non-toxic and apartment-friendly. The real key to success as a beginner in a small space isn’t choosing a paint, but understanding how to create a controllable, enjoyable, and safe workflow.
This guide moves beyond the simplistic “pros and cons” lists. We will deconstruct the two modern systems available to you. We will explore how to manage acrylic drying times, how to set up a completely solvent-free oil station, why your choice of brushes and paint quality matters more than you think, and how to master foundational techniques. By the end, you won’t just choose a paint; you’ll choose the right creative process for you.
To help you navigate this decision, this article breaks down the essential factors you need to consider. Here is a summary of the topics we will cover to help you build your perfect apartment-friendly painting system.
Summary: A Beginner’s Roadmap to Choosing the Right Paint
- Why Does Acrylic Paint Dry Too Fast For Blending Techniques?
- How To Paint With Oils In A Small Apartment Without Toxic Fumes
- Synthetic Vs Hog Bristle: Which Brush Holds The Shape For Heavy Body Paint?
- The Pigment Trap: Why Cheap Paints Make Color Mixing Impossible
- In Which Order To Layer Oil Paints To Prevent Cracking Over Time
- How To Set Up A Sewing Corner In A Studio Apartment Under $100
- How To Start An Emotion Journal With Just Pastels And Paper
- Pottery Vs Coding: Why Tactile Hobbies Are Essential For Tech Workers?
Why Does Acrylic Paint Dry Too Fast For Blending Techniques?
The single greatest source of frustration for beginners using acrylics is the notoriously short “open” time. Water is the vehicle for the acrylic polymer binder, and as it evaporates, the paint solidifies. This process can happen incredibly fast; thin acrylic layers can be touch-dry in under 15 minutes, compared to days or even weeks for traditional oils. This narrow blending window makes creating soft transitions, like the subtle shifts in a sky or a portrait, feel like a frantic race against the clock. Before you can soften an edge, the paint has already set, resulting in hard lines and a streaky, unfinished look.
However, thinking of this as a fatal flaw is a mistake. It is simply a characteristic that must be managed within a system. You can reclaim control over the drying time by introducing specific tools and mediums into your workflow. These additives are designed to slow the evaporation process, extending your working time from minutes to hours. This is not “cheating”; it is how professional acrylic artists work. The key is to stop fighting the paint and start using the system to make it work for you.
To achieve this, you can incorporate several techniques. A stay-wet palette, for instance, is a game-changer. It’s a sealed container with a sponge and a special membrane paper that keeps your paint mixtures workable for days. Likewise, adding a retarder medium to your paint on the palette or periodically misting your canvas with water from an atomizer can significantly extend your blending window. Mastering these system components transforms acrylic from a frustrating medium into a versatile and forgiving one.
How To Paint With Oils In A Small Apartment Without Toxic Fumes
The myth that oil painting is inherently toxic and requires a large, heavily ventilated studio is the biggest barrier for apartment artists. This belief is rooted in the traditional use of turpentine and mineral spirits as solvents for thinning paint and cleaning brushes. These chemicals release volatile organic compounds (VOCs) that are responsible for the strong odor and are hazardous to breathe in an enclosed space. Fortunately, the solvent-free oil painting system eliminates this problem entirely, making oils perfectly safe for a small apartment.
The cornerstone of this modern approach is the use of water-mixable (or water-soluble) oil paints. These are genuine oil paints, but the binder has been modified to allow cleanup with just soap and water, completely removing the need for harsh solvents. For a painting medium—to thin the paint or increase its flow—you can use non-toxic, natural oils like linseed, walnut, or safflower oil. This system provides all the benefits of traditional oils—rich color, long drying times, and beautiful blending—with none of the health hazards or ventilation requirements. Your workspace will smell of faint linseed oil, similar to a salad dressing, not a chemical plant.
With this solvent-free system, a tiny corner of a room can become a fully functional studio. Compact, portable setups like a pochade box can hold all your supplies and serve as a tabletop easel, allowing you to paint anywhere and easily store everything when you’re done. The image below shows just how efficient such a setup can be.
This demonstrates that the challenge is not the medium, but the setup. By choosing the right products, you can build a safe, compact, and highly effective oil painting system that fits perfectly into apartment life.
Action Plan: Your Complete Non-Toxic Oil Painting Setup
- Choose water-mixable oils to completely eliminate the need for turpentine or mineral spirits.
- Use refined linseed oil or walnut oil as your primary non-toxic painting medium to alter paint consistency.
- Clean your brushes thoroughly with gentle ivory soap and water instead of chemical solvents.
- For safety, store any oily rags or paper towels in a sealed metal container filled with water to prevent the low risk of spontaneous combustion.
- If you are extra sensitive to odors, a small tabletop air purifier with a carbon filter will remove any lingering scent of linseed oil.
Synthetic Vs Hog Bristle: Which Brush Holds The Shape For Heavy Body Paint?
Once you’ve chosen your paint system, your next crucial decision is the brush. The brush is your direct connection to the canvas, and its properties dramatically affect the painting experience. For beginners working with thick, heavy body paints (whether acrylic or oil), the debate often centers on traditional hog bristle versus modern synthetic brushes. Hog bristle has long been the standard for oil painting; its natural stiffness and flagged tips hold a large amount of paint and can create expressive, textural marks. However, they can be easily ruined by improper cleaning and don’t perform well with water-based acrylics, which cause them to lose their shape.
For a beginner, the clear winner is the modern stiff synthetic brush. Advances in manufacturing have created synthetic filaments that mimic the best qualities of hog bristle—stiffness and shape retention—while being far more durable and versatile. They are designed to withstand the rigors of heavy body acrylics and are completely resilient to the water used in acrylic painting and for cleaning water-mixable oils. This resilience is a huge advantage for a novice who is still learning proper brush care.
As professional art instructor Will Kemp notes in his analysis, this makes them ideal for newcomers. In the Will Kemp Art School, he advises:
Modern, high-quality stiff synthetics are superior for beginners as they are more resilient to improper cleaning and are versatile for both oils and acrylics.
– Professional art instructors, Will Kemp Art School analysis
This table breaks down the key differences in performance to help guide your choice:
| Feature | Synthetic Brushes | Hog Bristle |
|---|---|---|
| Durability with improper cleaning | High resilience | Easily damaged |
| Versatility (oils & acrylics) | Excellent | Good |
| Price point | Lower | Higher |
| Paint feel | Smoother glide | Scrubby resistance |
| Shape retention | Excellent with modern designs | Traditional standard |
Ultimately, the smooth glide of a synthetic brush offers a more forgiving experience, while its durability provides peace of mind. It’s the smart, practical choice for building a versatile painting kit.
The Pigment Trap: Why Cheap Paints Make Color Mixing Impossible
For a beginner on a budget, the giant “value pack” of student-grade paints seems like a logical starting point. This is the Pigment Trap, and it is the single most destructive mistake an aspiring artist can make. Student-grade paints are cheaper for a reason: they contain a low “pigment load.” This means the tube is filled with extenders, fillers, and additives, with only a small amount of the actual, expensive color pigment. While this business model is successful— student-grade acrylics are the fastest-growing subsegment at a 4.4% CAGR—it sets beginners up for failure.
When you try to mix colors with low-pigment paints, you are mostly mixing fillers. The results are weak, muddy, and unpredictable. A vibrant red and a bright blue won’t create a rich violet; they will produce a dull, grayish mess. You will find it impossible to achieve the clean, luminous colors you see in professional paintings, leading to immense frustration. You’ll assume the problem is your lack of skill, when in reality, the problem is the inferior quality of your materials.
Artist-grade paints, by contrast, have a very high pigment load. They are creamy, rich, and produce brilliant, clean colors when mixed. While a single tube is more expensive, it is far more powerful. A tiny dab of artist-grade paint has more tinting strength than a large blob of student-grade paint. The lesson is clear: your money is better spent on three tubes of high-quality primary colors (a red, a yellow, and a blue) plus a tube of white, than on a 24-pack of cheap, chalky paints that will only hold you back.
Case Study: Gradient Test Reveals Paint Quality Impact
In a controlled test, artist Daniel Folta compared the blending capabilities of different paints. Despite using a respectable brand of acrylics, he was unable to achieve a smooth gradient after three attempts. He then switched to professional-grade oil paint and produced the desired smooth blend easily on the first try. The experiment, detailed in an article on Evolve Artist’s blog, visually confirmed that high pigment load is directly responsible for superior blending capability and final color vibrancy, while paints with fillers inevitably create muddy, unpredictable mixtures.
In Which Order To Layer Oil Paints To Prevent Cracking Over Time
One of the most intimidating rules for beginners in oil painting is “fat over lean.” This principle is essential for the structural integrity and longevity of your painting. Ignoring it can cause the paint surface to crack, flake, and delaminate over time. “Fat” refers to paint with a higher oil content, which dries more slowly and flexibly. “Lean” refers to paint with a lower oil content (or thinned with a solvent, though we are using a solvent-free system), which dries faster and more rigidly. The rule is simple: each successive layer of paint should be more “fat” (have more oil) than the one beneath it.
If you paint a lean, fast-drying layer on top of a fat, slow-drying layer, the top layer will harden and become rigid while the layer underneath is still moving and oxidizing. This tension will inevitably cause the top layer to crack. As Art Prof’s Clara Lieu explains with a brilliant analogy in her tutorials:
Think of it like getting dressed for winter. The lean layer is your thin t-shirt, the middle layers are your sweater, and the fat layer is your waterproof jacket.
– Art Prof Clara Lieu, Art Prof Oil Painting Tutorial
For a beginner in a solvent-free system, this can be simplified into a clear, three-stage process. You don’t need complex medium recipes. You just need to control the amount of oil you add in the final stages.
- Stage 1 (Underpainting): For your initial drawing or block-in, use paint thinned with a bit of water (if using water-mixable oils) or a solvent-free fluid. This creates a very lean, fast-drying foundation.
- Stage 2 (Main Layers): For the main body of your painting, use paint straight from the tube with no added medium. This is your “middle” layer.
- Stage 3 (Highlights/Glazes): For your final details, brightest highlights, or thin, glassy glazes, mix your paint with a drop of linseed oil. This makes the paint fatter, richer, and ensures it’s the most flexible top layer.
A crucial part of this process is the “touch dry” rule: always wait until a layer is dry to the touch (it shouldn’t leave a mark on a gloved finger) before applying the next one.
How To Set Up A Sewing Corner In A Studio Apartment Under $100
While this section title mentions sewing, the underlying principle is universal for any creative pursuit in a small space: creating a dedicated, functional, and affordable creative corner. The challenge for an apartment artist is not just finding the space, but making it efficient and easy to put away. The goal is to minimize setup and cleanup time, so you can spend more of your precious time actually painting. Achieving this on a budget of under $100 requires thinking about multi-functionality and portability.
You don’t need a dedicated art desk. A simple rolling kitchen cart or utility cart can be a brilliant solution. It can serve as your mobile painting station, holding your palette, paints, and brushes while you work, and can be easily rolled into a closet or corner when you’re finished. This single piece of furniture can also double as a temporary kitchen island or bookshelf, making it a wise investment for any studio apartment dweller.
The concept of a “studio-in-a-box” is another powerful tool for staying organized and under budget. A cantilever toolbox, typically used for hardware, is a perfect portable painting system.
Case Study: Multi-Purpose Creative Space Solutions
As documented in tutorials on the Will Kemp Art School site, artists have successfully adapted everyday items for their creative needs. One common strategy is using a cantilever toolbox as a “studio-in-a-box,” with tiered trays that perfectly organize tubes of paint, brushes, and mediums. Another artist showcased a setup where a single rolling kitchen cart, purchased for under $70, served as both their primary painting surface and their sewing station. By choosing multi-functional furniture, they maximized their small space and stayed well within a $100 budget, proving that a dedicated creative corner is achievable through smart, practical choices.
By combining a rolling cart with a toolbox, you can create a complete, mobile, and affordable studio for well under $100. This setup respects your limited space and budget, making a consistent creative practice possible.
How To Start An Emotion Journal With Just Pastels And Paper
The act of creating art is often deeply connected to emotional expression. While this section’s title refers to pastels and journaling, the core idea—using art to process and express feelings—is a primary motivation for many aspiring painters. The choice between oils and acrylics is not just a technical decision; it is a choice that will profoundly impact your ability to achieve this emotional release. If you are constantly fighting your materials, you will experience frustration, not fulfillment.
p>
The goal is to reach a state of flow, where the tools become an extension of your intention. This is where the emotional benefits of art-making are unlocked. Indeed, research shows that artistic expression is essential for emotional fulfillment, with painters in particular connecting their activity to powerful feelings of joy and pride. This feeling of accomplishment is the reward for overcoming a creative challenge. However, this is only possible if the challenge is the creative problem itself (e.g., “how do I capture this light?”), not a technical one (“why won’t my paint do what I want?”).
If you choose a fast-drying acrylic system without understanding how to control it, your attempts to express a soft, peaceful feeling might result in a canvas full of harsh, angry-looking lines. The disconnect between your intention and the result leads to discouragement. Conversely, if you choose a system that aligns with your goals—whether that’s slow-drying acrylics for gentle blending or responsive oils for rich, layered textures—the medium becomes a partner in your emotional exploration. The technical decisions we’ve discussed are the foundation upon which this expressive freedom is built. Choosing the right system is the first step to ensuring your painting practice is a source of joy and pride, not a battle against your tools.
Key Takeaways
- Both oils and acrylics have modern, non-toxic, and controllable systems suitable for small apartments.
- The “system” (mediums, brushes, setup) is more critical for a beginner’s success than the paint tube alone.
- Invest in a few high-pigment “artist-grade” paints rather than a large set of “student-grade” paints to avoid the frustration of the “pigment trap.”
Pottery Vs Coding: Why Tactile Hobbies Are Essential For Tech Workers?
At this point, you have the technical knowledge to choose a painting system. But it’s worth asking a larger question: why do this at all? In a world dominated by screens, coding, and digital work, what is the value of a messy, hands-on hobby like painting? The answer lies in the profound, restorative power of tactile engagement. The physical act of mixing a color, the feeling of a loaded brush dragging across a canvas, and the challenge of working with a physical material are not just quaint pastimes; they are essential for cognitive balance.
This is more than just a feeling; it is rooted in neuroscience. As research into embodied cognition has shown, the brain processes information differently when the body is physically involved. Working with your hands is not a mindless activity; it is a different, deeply engaging form of thinking.
Working with your hands on a physical material with constraints like paint drying or clay collapsing activates different, restorative neural pathways compared to screen-based work.
– Neuroscience research on embodied cognition, Art therapy and cognitive restoration studies
This need for tactile, restorative activity is reflected in a growing trend of professionals in digital fields turning to hands-on creative hobbies. It serves as a necessary counterbalance to the abstract, disembodied nature of screen-based labor. It is a form of productive meditation that grounds you in the physical world.
Case Study: Tech Workers Embrace Tactile Arts for Mental Health
A recent survey of global collecting trends revealed that professionals in digital fields are increasingly turning to hands-on creative activities for mental health and fulfillment. The study notes that these individuals feel that creating art is “an essential part of who they are” and something they “NEED to do in order to express their inner selves and feel fulfilled.” This trend, as detailed in a report from Art Basel, highlights a growing recognition of the need for the productive meditation and mental restoration that come from tactile engagement.
Choosing to learn oil or acrylic painting is not just about acquiring a new skill. It is about actively choosing to engage your mind and body in a different, deeply human way. It is an antidote to the digital everyday, and an essential practice for a balanced and fulfilled life.
Now that you understand the systems and the philosophy, the next logical step is to begin. Choose one tube of high-quality paint in your favorite color, the corresponding medium, a good brush, and start making your first marks.