
You think soundproofing is just about blankets and foam panels? The real secret to a professional-sounding bedroom studio isn’t just blocking external noise, but eliminating the invisible friction within your workflow. This guide reveals how mastering buffer sizes, compression, and even your sample library is the ultimate form of ‘soundproofing’—insulating your creativity and mix quality from the technical pitfalls that kill inspiration.
The dreaded knock on the door from a neighbor. The rumble of a passing truck ruining the perfect vocal take. For bedroom producers, the battle for a clean, quiet space is constant. The internet is full of “shoestring” advice: hang heavy blankets, stick mattresses to the walls, or plaster your room with cheap acoustic foam. While these can slightly dampen reflections, they barely touch the real problem of soundproofing, which is about mass and isolation.
These common tips often confuse acoustic treatment (controlling sound *inside* the room) with soundproofing (stopping sound from entering or leaving). But what if the most significant “noise” you need to insulate yourself from isn’t the traffic outside, but the technical gremlins inside your computer? The latency that trips up your performance, the muddy frequencies that cloud your mix, and the decision fatigue from a bloated sample library are all forms of interference that sabotage your music.
The real art of soundproofing your studio on a budget is about a deeper, more holistic approach. It’s about insulating your entire creative process from friction. It means understanding the physics of your digital audio workstation, the psychology of your creative choices, and the precise mechanics of your tools. This is where you gain a professional edge without spending a fortune.
This guide will walk you through the essential checkpoints for soundproofing your workflow. We’ll explore the fundamental choices that define your sound, from the core philosophy of your software to the intricate art of compression, and even the digital hygiene that keeps your creativity flowing. Think of it as acoustic engineering for your entire production setup.
Summary: Mastering the Inner Workings of Your Bedroom Studio
- Ableton Live vs Logic Pro: Which Software Flows Better for Electronic Music?
- How to Layer Synth Basses to Create a Wall of Sound?
- Why Your Audio Interface Buffer Size Causes Delay When Recording Vocals?
- The Over-Compression Mistake That Sucks the Life Out of Your Mix
- When to Purge Your Sample Library: Keeping Only Sounds That Inspire
- VS Code vs PyCharm: Which Editor Is Less Intimidating for Beginners?
- White Noise vs Pink Noise: Which Sound Frequency Masks Traffic Better?
- Python or JavaScript: Which Language Should Hobbyists Learn First?
Ableton Live vs Logic Pro: Which Software Flows Better for Electronic Music?
The first step in soundproofing your workflow is choosing a Digital Audio Workstation (DAW) that feels like an extension of your brain, not a barrier. For electronic musicians, the debate often boils down to Ableton Live vs. Logic Pro. The answer isn’t about which is “better,” but which one’s core philosophy aligns with your creative process. It’s a choice between real-time flexibility and arrangement-focused efficiency.
Ableton Live was built from the ground up for live performance and improvisation. Its famous Session View allows for clip-launching and non-linear creation, making it a playground for generating ideas on the fly. Logic Pro, conversely, excels in a more traditional, linear recording and mixing environment. Its strength lies in its comprehensive tools for composing, editing, and polishing a track from start to finish. This fundamental difference is reflected in how they handle computer resources.
| Feature | Ableton Live | Logic Pro |
|---|---|---|
| Real-time Performance | True real-time processing, no pre-calculation | Pre-calculates non-armed tracks for efficiency |
| CPU Usage | Higher CPU usage for live flexibility | More CPU-efficient through preprocessing |
| Workflow Priority | Optimized for live performance and session view | Optimized for arrangement and mixing |
| Buffer Management | Fixed real-time buffer | Automatic buffer adjustment |
As the table illustrates, Ableton’s commitment to real-time processing demands more from your CPU, while Logic’s ability to pre-calculate inactive tracks makes it more efficient for large, complex arrangements. Furthermore, your hardware plays a massive role. Interestingly, recent performance tests show that the older Apple M1 Pro chip can outperform the newer M3 Pro in certain audio tasks, proving that the latest specs don’t always guarantee the smoothest experience. The key is to match the DAW’s workflow to your personal style to minimize creative friction.
How to Layer Synth Basses to Create a Wall of Sound?
A common problem for bedroom producers is a bass that’s either weak and lost in the mix or overwhelmingly muddy, consuming all the sonic space. Creating a powerful “wall of sound” without this muddiness isn’t about one magic plugin; it’s about the acoustic-physical principle of layering frequencies. The goal is to build a composite bass from multiple, distinct synth layers, each occupying its own specific frequency band.
Think of it like building a structure. You need a solid foundation, supportive walls, and defining details. For bass, this translates to sub-bass for weight, mid-bass for body, and a high-bass layer for presence and definition. By carefully carving out a space for each layer using filters, you ensure they complement each other instead of fighting for the same sonic real estate. This technique gives you a bass that feels huge on a club system but remains clear and defined on smaller speakers like a phone or laptop.

The process is methodical and requires disciplined use of equalization (EQ) and filtering. Each layer has a job, and it should be sculpted to do only that job. Here is a practical, step-by-step approach to building a formidable bass sound from the ground up:
- Start with a sub-bass foundation: Use a simple sine or triangle wave for a pure tone below 100Hz. This layer is felt more than heard and provides the physical weight.
- Add a mid-bass layer: Create a sound with more harmonic content (like a saw or square wave) and filter it to sit roughly between 100-400Hz. This gives the bass its body and warmth.
- Include a high-bass layer: This layer, often slightly distorted or saturated, lives above 400Hz. It provides the attack, grit, and definition that helps the bass cut through the mix on small speakers.
- Use high-pass filters aggressively: To prevent frequency overlap, apply a high-pass (low-cut) filter on your mid and high layers to remove unnecessary sub-bass information. This is the most crucial step for avoiding mud.
- Apply subtle saturation: Instead of just turning up the volume, use saturation or subtle distortion on the mid and high layers to create pleasing harmonics, which make the bass sound richer and louder without consuming headroom.
- Check mono compatibility: Frequently check your layered bass in mono. If the bass disappears or weakens significantly, you may have phase issues between your layers that need to be corrected.
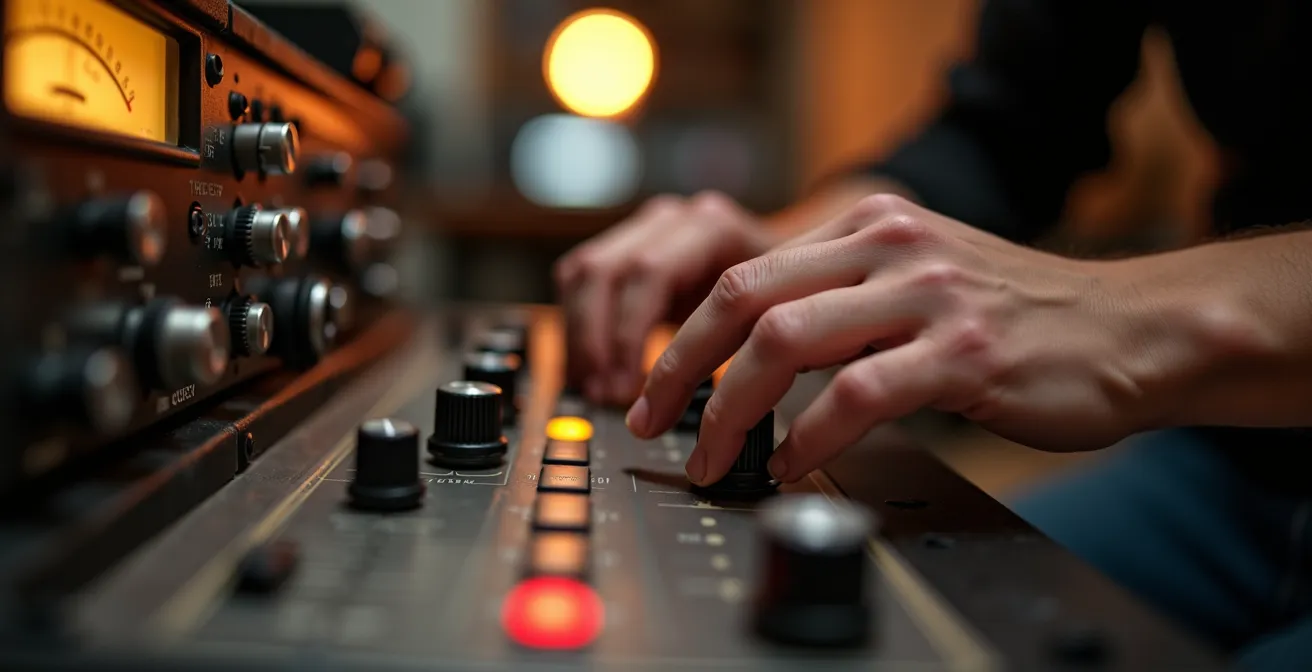
Why Your Audio Interface Buffer Size Causes Delay When Recording Vocals?
You press record, start singing, and hear your voice coming back into your headphones a split second late. This distracting delay, known as latency, is one of the most common workflow-killers for a bedroom producer. It’s caused by a fundamental trade-off in digital audio processing, governed by a single setting: the audio interface buffer size. Understanding this setting is like learning the physics of your studio.
The buffer is a small chunk of computer memory where audio data is temporarily stored before being processed by the CPU. A larger buffer gives your computer more time to process the audio, which prevents pops, clicks, and dropouts, but it increases the delay (latency). A smaller buffer reduces this delay, giving you a near-instant response ideal for recording, but it puts much more strain on your CPU. This can lead to system overloads, especially in complex projects.
The amount of latency is directly measurable. For instance, controlled buffer settings tests reveal that a buffer of 256 samples at a 44.1kHz sample rate creates approximately 7ms of latency—a delay that is often perceptible and disruptive to a performer. Lowering it to 32 samples can bring latency down to under 2ms, which is virtually unnoticeable. However, this demands a powerful CPU or a very simple project. An audio engineer’s test with an RME Multiface interface showed that at 32 samples (0.7ms latency), a system could run stably up to 60-70% CPU usage, demonstrating the razor’s edge you walk between low latency and system stability.
The solution is a two-part workflow. When recording, use the lowest possible buffer size your system can handle without clicks or pops (e.g., 64 or 128 samples). When mixing, where you have many plugins and real-time performance isn’t critical, increase the buffer size to its maximum (e.g., 1024 or 2048 samples) to give your CPU plenty of breathing room. This simple switch is a non-negotiable technique for a smooth, frustration-free production process.
The Over-Compression Mistake That Sucks the Life Out of Your Mix
Compression is a producer’s most powerful tool for controlling dynamics, but it’s also the most misunderstood and abused. Used correctly, it adds punch, cohesion, and professional polish. Used incorrectly, it leads to a flat, lifeless, and fatiguing mix. This destructive practice is known as over-compression, and it’s the sonic equivalent of crushing a beautiful photograph until all the shadows and highlights disappear into a gray mess.
As explained by audio professional Julian Blackmore for the eMastered blog, this is the core of the issue:
Over-compression occurs when audio is excessively compressed, to the point where the dynamics of the signal are squished to oblivion
– Julian Blackmore, eMastered Blog
The “life” in a musical performance comes from its dynamic range—the difference between the quietest and loudest parts. Over-compression eradicates this range. Fast attack times can obliterate the initial punch (transient) of a drum hit, and an excessively low threshold can make a vocal performance feel robotic and devoid of emotion. The goal is to control dynamics, not annihilate them. It’s about taming the peaks, not flattening the entire landscape.
Action Plan: Auditing Your Compression Habits
- Check your Ratios: Are you defaulting to high ratios? For most sources, start conservatively with 2:1 to 4:1. High ratios (10:1 or more) are limiting, not compressing.
- Audit your Attack Times: Is your attack time set too fast? A fast attack kills the natural punch of percussive sounds. Slow it down until you hear the initial “snap” or “thwack” return.
- Measure your Gain Reduction: Look at your meter. Are you consistently getting more than 6dB of gain reduction? If so, you’re likely compressing too hard. Aim for 3-6dB of reduction on peaks for most transparent compression.
- Listen to the Release: Is the release time set correctly? It should be fast enough to let the signal return to zero before the next hit, but not so fast that it creates an unnatural “pumping” sound.
- Conduct an A/B Test: Always use the compressor’s bypass switch. Does the compressed signal genuinely sound better—more controlled and punchy—or just louder and flatter? Match the output gain to the uncompressed level for a fair comparison.
When to Purge Your Sample Library: Keeping Only Sounds That Inspire
In the digital age, it’s easy to amass tens of thousands of drum samples, synth presets, and loops, a condition known as “collector’s fallacy.” We hoard sounds we *might* use one day, but this digital clutter creates a significant problem: cognitive load. When you’re faced with 500 kick drum samples, you don’t feel empowered; you feel paralyzed. This decision fatigue is a form of mental noise that stifles creativity just as effectively as a buzzing amplifier.
Soundproofing your creative mind requires curating your sample library with the ruthless efficiency of a museum curator. The goal is not to have the biggest library, but the most inspiring one. If a sound doesn’t spark an immediate idea or fit into a category you regularly use, it’s noise. It’s a distraction that pulls you out of your creative flow while you endlessly scroll through folders.
The solution is a periodic purge. Think of it like the “Marie Kondo method” for producers: if a sample doesn’t spark joy or serve a clear purpose, it has to go. This isn’t about loss; it’s about gain. You gain speed, focus, and a deeper familiarity with your core toolkit. Having a smaller, killer library of 500-1000 sounds you know and love is infinitely more powerful than having 50,000 files you barely recognize. This discipline forces you to become more creative with a limited palette, often leading to more unique and signature sounds.
A well-organized library should be structured around function. Instead of generic folders, create categories like ‘Inspirational Starters,’ ‘Essential Layers,’ and ‘Finishing Touches’ or ‘Ear Candy.’ This way, you’re not just looking for a “snare,” you’re looking for a sound with a specific creative purpose. Regularly scheduled audits, perhaps every 3 to 6 months, are crucial for maintaining this streamlined and inspiring environment.
VS Code vs PyCharm: Which Editor Is Less Intimidating for Beginners?
As you delve deeper into production, you might want to automate tasks, create custom MIDI tools, or analyze audio files. This is where coding enters the picture, and choosing your first code editor is like choosing your first instrument. For beginners, the choice often comes down to two giants: Visual Studio Code (VS Code) and PyCharm. For a hobbyist producer just starting to code, the less intimidating option is almost always VS Code.
The core difference lies in their philosophy. PyCharm is an Integrated Development Environment (IDE) built by JetBrains, specifically for Python. It’s incredibly powerful, but it comes “fully loaded” with a vast array of features, windows, and configurations that can be overwhelming. It’s the equivalent of sitting in a Boeing 747 cockpit when you just want to learn to fly a small Cessna. It assumes you are, or will become, a professional developer.
p>
VS Code, on the other hand, is a lightweight, modular text editor. It starts as a simple, clean slate. Its power comes from its vast marketplace of extensions. You only add the features you need, when you need them. Want to work with Python? Install the Python extension. Dabbling in JavaScript for a web audio project? Add the Prettier extension. This “à la carte” approach dramatically lowers the initial barrier to entry. You learn the tool as you grow, preventing the initial intimidation that causes many to give up.
For a bedroom producer, your projects will likely be small scripts for different purposes. VS Code’s flexibility to handle multiple languages (like Python and JavaScript) in a single, familiar interface makes it a more practical and less daunting “Swiss Army knife” for your technical toolkit. You can build your coding environment piece by piece, just as you build a track layer by layer.
White Noise vs Pink Noise: Which Sound Frequency Masks Traffic Better?
Sometimes, the best way to “soundproof” is not to block sound, but to mask it. This is where noise colors like white and pink noise come in. They are constant, broadband sounds that can cover up distracting intermittent noises like traffic, voices, or construction. But they aren’t the same. The choice between them depends on the type of noise you want to mask, and for most low-frequency rumbles like traffic, pink noise is the more effective and pleasant-sounding tool.
The difference is in their frequency spectrum. White noise has equal energy per frequency. This results in a sound that is heavy on high frequencies, like a hiss or static (`shhhh`), because there are more high frequencies in the audible spectrum. This can be effective for masking high-pitched sounds but can also become harsh and fatiguing over time.
Pink noise, conversely, has equal energy per octave. This means its energy decreases as the frequency increases, resulting in a more balanced sound with more power in the lower frequencies. It sounds deeper, like a waterfall or steady rain (`ffff`). This additional low-frequency energy is precisely why pink noise is better at masking the low-end rumble of traffic or the bass from a neighbor’s stereo. It fights fire with fire, covering the problem frequencies with a more natural and less intrusive sound.
Case Study: Advanced Use of Pink Noise
Beyond simple masking, pink noise is a critical tool for audio engineers. In a process called room analysis, engineers play pink noise through their studio monitors and use a spectrum analyzer to measure the room’s frequency response. Because pink noise is balanced across octaves, any significant peaks or dips shown on the analyzer reveal problematic resonant frequencies or “nulls” in the room. This technique allows bedroom producers to identify acoustic issues and make better mixing decisions, even in an untreated space.
Key takeaways
- The “best” DAW is the one that matches your brain’s workflow, not a spec sheet; it’s a choice between real-time ideation and structured arrangement.
- Effective soundproofing is a dual strategy: manage external noise while optimizing your internal workflow against latency, mix muddiness, and other technical friction.
- Mastering fundamentals like bass frequency layering and disciplined dynamic range control (compression) has a far greater impact on your sound than expensive plugins.
Python or JavaScript: Which Language Should Hobbyists Learn First?
For the bedroom producer who loves to tinker, learning to code is the final frontier of DIY. It unlocks the ability to create custom plugins, automate tedious tasks, and generate music algorithmically. The two most accessible starting points are Python and JavaScript. While both are immensely powerful, the right choice for a hobbyist depends entirely on what you want to achieve: offline analysis and scripting (Python) or real-time, interactive tools (JavaScript).

Python is often celebrated for its gentle learning curve and clean syntax, making it a fantastic first language. In the music world, its strength lies in data analysis and offline processing. With libraries like `librosa`, you can analyze the tempo, key, and structure of audio files. With `mido`, you can programmatically create and manipulate MIDI patterns. If your goal is to build a tool that organizes your sample library or generates a MIDI chord progression to import into your DAW, Python is your best bet. It has strong support for scripting inside DAWs like REAPER.
JavaScript, the language of the web, shines in a completely different domain: real-time interactivity. Its native Web Audio API allows you to build synthesizers, sequencers, and effects that run directly in a web browser. More importantly for Ableton users, it is the language behind Max for Live, which allows you to build custom devices and instruments that integrate directly into Ableton Live’s interface. If you dream of building your own unique synth or a wild MIDI effect you can play with in real-time, JavaScript is the path to take.
The following table breaks down the core differences in a music production context:
| Aspect | Python | JavaScript |
|---|---|---|
| Audio Libraries | librosa, mido for MIDI | Web Audio API, Tone.js |
| DAW Integration | REAPER scripting support | Max for Live (Ableton) |
| Learning Curve | Gentler for beginners | Immediate browser results |
| Use Cases | Offline processing, analysis | Real-time web synths |
Now, instead of trying to fix everything at once, pick one bottleneck we’ve discussed—be it latency, a muddy bass, or a messy sample folder—and dedicate your next session to solving it. That’s the first real step to truly soundproofing your creative space and elevating your music.
Frequently Asked Questions About Bedroom Production Workflows
How often should I audit my sample library?
A good rule of thumb is to audit your library every 3-6 months. The goal is to remove samples you haven’t used and to better organize the ones you keep. A great system is to sort them into functional categories like ‘starters’ (sounds that inspire a new track), ‘layers’ (sounds to flesh out existing ideas), and ‘ear candy’ (unique sounds for adding final detail).
What’s the ideal size for a working sample library?
Quality over quantity is the key principle. Aim for a curated collection of 500-1000 high-quality samples that you know well, rather than hoarding 10,000+ unorganized files. A massive library often leads to decision fatigue and slows down the creative process, whereas a smaller, more familiar toolkit encourages faster and more decisive work.
Should I keep samples I might use ‘someday’?
Apply the Marie Kondo method to your sound library: if it doesn’t spark immediate creative joy or if you haven’t found a use for it in the last 6 months, it’s probably safe to delete it. Keeping “someday” sounds contributes to cognitive load and digital clutter. A lean, inspiring library is a more powerful creative weapon than a bloated, disorganized archive.